Hey there! So you’re thinking about getting into the whole auto-posting AI content thing with Webflow, huh? Well, you’re in the right place. This guide is gonna walk you through everything you need to know. From setting up your Webflow account to picking the best AI tools and making sure your content is SEO-friendly, we’ve got you covered. Plus, we’ll dive into automating the posting process and keeping an eye on how your content is doing. Let’s get started!
Key Takeaways
- Auto-posting AI content to Webflow can save you loads of time and effort.
- Webflow’s features make it easy to integrate AI-generated content.
- Choosing the right AI tools is crucial for creating quality content.
- SEO optimization is key to getting your content seen by more people.
- Regularly updating your strategy keeps you ahead of trends.
Understanding the Basics of Auto-Posting AI Content to Webflow
What is Auto-Posting?
Auto-posting is like having a virtual assistant for your online content. It’s a process where content is automatically published to your website without manual intervention. Think of it as setting up a schedule for your posts, and then they just appear like magic on your site. This is super handy for keeping your site fresh and active, especially when you’re busy doing other things.
Benefits of Using AI for Content Creation
Using AI for content creation can save you loads of time and effort. Here are a few reasons why AI is a game-changer:
- Efficiency: AI can produce content much faster than a human, allowing you to focus on other tasks.
- Consistency: AI ensures a consistent tone and style across all your content.
- Scalability: With AI, you can easily ramp up your content production without needing to hire more writers.
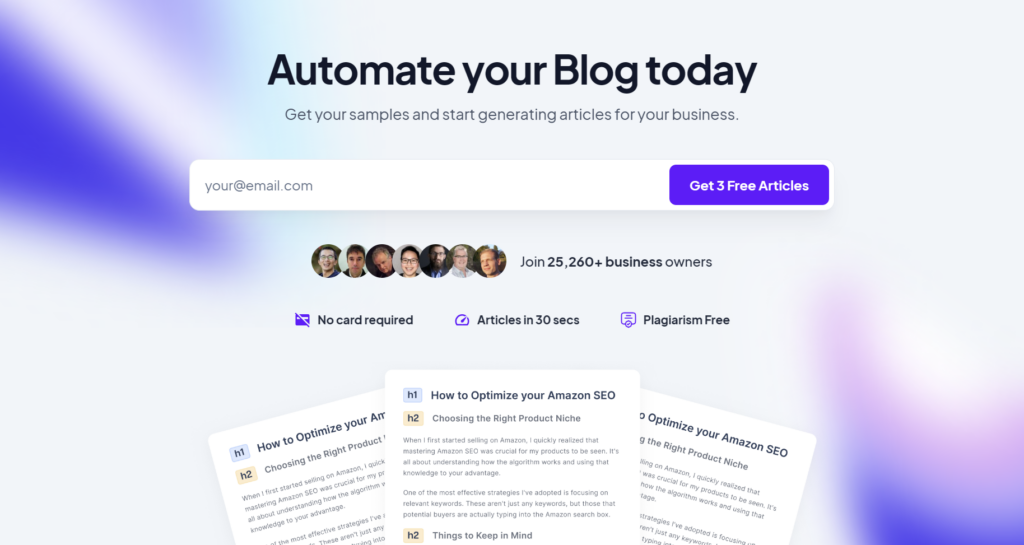
AI tools like Junia AI can help automate content creation for Webflow, making it easier to develop engaging landing pages and SEO-optimized blogs.
Pro Tip: AI-generated content can be a great starting point. Use it to draft ideas and then tweak it to add your personal touch.
Overview of Webflow’s Capabilities
Webflow is a powerful platform for building websites, offering a drag-and-drop interface that makes it easy for anyone to create professional sites without coding. Here’s a quick look at what Webflow can do:
- Responsive Design: Webflow ensures your site looks great on any device, from phones to desktops.
- CMS Features: It has a content management system that lets you easily manage and update your site’s content.
- SEO Tools: Webflow provides built-in tools to help you optimize your site for search engines.
By integrating AI with Webflow, you can automate tasks like content creation and SEO optimization, freeing up your time for more creative pursuits. It’s a perfect match for anyone looking to streamline their web development process.
Setting Up Your Webflow Account for AI Integration
Creating a Webflow Account
First things first, you need a Webflow account. Signing up is a breeze. Just head over to the Webflow website and click on the sign-up button. You’ll need to provide some basic information like your name, email address, and a password. Once you’ve done that, you’re in. Webflow usually offers a free plan to get you started, which is perfect if you just want to explore the features before committing.
Exploring Webflow’s Features
Once you’re in, take some time to get familiar with what Webflow has to offer. It’s got a lot more than just a website builder. You’ve got the drag-and-drop editor, CMS capabilities, and even e-commerce options if you’re looking to sell products. Spend some time clicking around, maybe watch a few tutorials. You’ll find that Webflow is pretty intuitive and packed with features that can support AI integration, like custom code embedding and API access.
Preparing Your Site for AI Content
Before you dive into integrating AI, make sure your site is ready. This means having a clear structure and design in place. Think about how AI content will fit into your site. Will it be part of a blog, or maybe a product description? Ensure your design is responsive so it looks good on all devices. Also, streamline your site’s navigation to make sure users can easily find the AI-generated content. You might also want to generate an API token to facilitate the integration process. This involves going to your Site settings, selecting Apps & integrations, and accessing API access to create a token by entering a name and choosing the desired permissions. This will make the integration process smoother and more efficient.
Getting your Webflow account set up correctly from the start will save you a lot of headaches later on. Spend that extra time now to explore and prepare, and it’ll pay off when you start integrating AI tools.
Choosing the Right AI Tools for Content Generation

Popular AI Content Generators
Finding the right AI content generator is like picking the right tool for building a house. You want something that fits your needs and makes your job easier. Some of the top AI tools for content creation out there include Copy.ai and Jasper.ai. They help you whip up text based on your input, which can be a lifesaver when you’re stuck. These tools are popular because they adapt to your style and can handle large volumes of content quickly.
Factors to Consider When Selecting AI Tools
When choosing an AI tool, think about these factors:
- Ease of Integration: How well does it work with your existing systems like Webflow?
- Cost: Is it within your budget?
- Features: Does it have the capabilities you need, like SEO optimization or multi-language support?
It’s like picking a new coffee maker. You want it to fit on your counter, be easy to use, and make a good cup of joe.
Integrating AI Tools with Webflow
Once you’ve picked your AI tool, it’s time to connect it with Webflow. This can usually be done by embedding scripts or using APIs. Webflow’s flexibility allows you to integrate these tools smoothly, so your content updates automatically without you lifting a finger. Imagine it like setting up a smart home system; once everything is connected, it just works, making life simpler.
Implementing AI-Generated Content on Your Webflow Site
Embedding AI Content into Webflow
Getting AI-generated content onto your Webflow site is like piecing together a puzzle. First, you need to choose the right AI tool that aligns with your content needs. Whether it’s generating blog posts or creating engaging product descriptions, the tool must fit your purpose. Once you’ve picked your tool, it’s time to integrate it with Webflow. Most AI tools provide an API or a plugin, which makes the integration process straightforward. Simply embed the necessary scripts or connect via Webflow’s CMS, and you’re good to go.
Customizing AI Content for Your Audience
AI can churn out content at an impressive speed, but tweaking it to match your audience’s taste is key. Start by defining your target audience and understanding what they find engaging. Use Webflow’s design capabilities to adjust the layout and presentation of the AI content to better resonate with your readers. You might want to alter the tone, style, or even the format to ensure it aligns with your brand’s voice.
- Identify your audience’s preferences.
- Adjust the tone and style of the content.
- Use Webflow’s design tools to enhance presentation.
Ensuring Content Consistency and Quality
AI content is a great starting point, but maintaining consistency and quality is crucial. Regularly review the AI-generated content to ensure it aligns with your brand standards. Create a checklist that includes:
- Consistency in voice and tone.
- Accuracy of information.
- Relevance to current trends and audience interests.
AI tools are excellent at generating content, but human oversight ensures that the content maintains its quality and relevance over time. With consistent monitoring, your AI-generated content can be both efficient and effective.
Embedding AI content into Webflow AI Assistant allows you to efficiently create dynamic content that captivates your audience while maintaining control over its quality and presentation.
Optimizing AI Content for SEO in Webflow
Understanding SEO Basics
Search Engine Optimization (SEO) is all about making your website more visible to people who use search engines. It’s like setting up a shop in a busy street rather than a back alley. The better your SEO, the easier it is for folks to find you online. In Webflow, you can tweak various elements, like meta tags and alt text, to improve your site’s SEO. Just remember, SEO is not a one-time task; it requires ongoing effort.
Using AI for SEO Optimization
AI is a big helper when it comes to boosting visibility and refining your SEO strategies. It can suggest keywords, optimize content, and even predict how changes might affect your site’s ranking. AI tools like MarketMuse or Clearscope analyze huge amounts of data and recommend topics and keywords that align with current search trends. This means you can stay ahead without spending hours on research.
Monitoring and Adjusting SEO Strategies
SEO isn’t static, and neither should your strategies be. Regularly check your site’s performance using analytics tools available in Webflow. Look at metrics like page load times, bounce rates, and user engagement. This data helps you understand what’s working and what needs tweaking. If a particular keyword isn’t performing well, AI tools can suggest alternatives, ensuring your content remains relevant and effective.
Keeping an eye on your SEO metrics is like checking your car’s dashboard while driving. It helps you steer your website in the right direction, ensuring you don’t stray off course.
Automating the Posting Process with Webflow and AI
Setting Up Automated Workflows
Automating your content posting process on Webflow using AI can save you loads of time. Think of it as having a personal assistant who never sleeps. To kick things off, you’ll need to set up automated workflows. This can be done by connecting Webflow with an automation tool like Zapier. Here’s a simple guide:
- Link your Webflow account to Zapier.
- Choose your blogging platform (like WordPress) as the action app.
- Create a "Zap" that triggers whenever new content is published on Webflow.
Scheduling Content Posts
Once your automation is in place, it’s time to schedule your content. This is where you decide when your posts go live. Scheduling helps maintain a steady flow of content, keeping your audience engaged. Plus, it aligns perfectly with your content strategy. You can plan posts for specific times or dates, ensuring your content hits the mark every time.
Troubleshooting Common Issues
Even with the best automation setup, hiccups can happen. Maybe a post doesn’t publish, or there’s a formatting error. Don’t sweat it. Here are a few troubleshooting tips:
- Double-check your Zapier connections.
- Ensure your Webflow account has the necessary permissions.
- Review the logs for any error messages.
Automation is a game-changer in the world of AI integration in Webflow. It not only streamlines your workflow but also enhances your site’s performance. Embrace it, and you’ll wonder how you ever managed without it.
Analyzing the Performance of AI-Generated Content
Using Analytics Tools in Webflow
To really get a handle on how your AI-generated content is doing, you gotta use the right tools. Webflow offers a bunch of analytics tools that can help you track important metrics. These tools can give you insights into how users are interacting with your content. You can monitor things like page views, bounce rates, and average time spent on a page. It’s like having a backstage pass to see how your audience is engaging with your content.
Interpreting Content Performance Data
Once you’ve got all this data, the next step is figuring out what it all means. Start by looking at engagement metrics. Are people sticking around to read your stuff, or are they leaving right away? High bounce rates might mean your content isn’t grabbing attention. Conversion rates are another biggie. If your content is supposed to lead to a sale or a signup, you need to see if that’s actually happening. And don’t forget user feedback. Sometimes, the best insights come from just listening to what your audience has to say.
Making Data-Driven Improvements
Now that you’ve got the data and you know what it means, it’s time to make some changes. Maybe you need to tweak your headlines to be more catchy or adjust your call-to-action to be more compelling. You might even find that some topics just aren’t resonating with your audience, and it’s time to try something new. Keep testing and iterating. Remember, monitoring and adapting AI-generated content is key to making sure it stays effective and relevant.
Staying Updated with AI and Webflow Trends

Following Industry News
Keeping up with the latest news in AI and Webflow is like trying to catch a moving train. The technology is advancing rapidly, and new features are being rolled out almost every other month. Stay informed by subscribing to tech blogs, newsletters, and forums. These resources will help you catch wind of any new updates or features that might benefit your workflow. Additionally, attending webinars and online conferences can provide insights directly from industry leaders.
Adapting to New AI Features
AI is constantly evolving, bringing in new tools and capabilities that can transform how you work with Webflow’s AI assistant. It’s crucial to experiment with these features to see what fits best with your design needs. Start by integrating small AI functionalities into your projects and gradually expand as you become more comfortable. Remember, the goal is to enhance your design process, not overwhelm it.
Continuously Improving Your Strategy
Adapting to new trends isn’t just about using the latest tools—it’s about refining your approach. Regularly assess how AI and Webflow’s latest updates impact your workflow and results. Do you notice any improvements in efficiency or creativity? Are there areas where the integration falls short? Use this information to tweak your strategy, ensuring you always get the best results from your tools.
In the fast-paced world of AI and web design, staying updated is not just beneficial—it’s essential. By keeping an eye on industry trends and adapting to new features, you can maintain a competitive edge and create smarter, more responsive websites.
Wrapping It Up
So, there you have it. Getting AI content to auto-post on Webflow isn’t as daunting as it might seem at first. With the right tools and a bit of patience, you can streamline your workflow and keep your site fresh without breaking a sweat. Sure, there might be a hiccup or two along the way, but that’s just part of the learning curve. Once you get the hang of it, you’ll wonder how you ever managed without it. So go ahead, dive in, and start making the most of what AI has to offer for your Webflow projects. Happy posting!
Frequently Asked Questions
What is auto-posting and how does it work?
Auto-posting is when content is automatically uploaded to your website without needing to do it manually each time. It uses tools to schedule and publish content based on a set plan.
Why should I use AI for creating content?
AI can help make content faster and easier by writing articles, descriptions, or updates based on what you need. It saves time and helps keep your site fresh with new content.
What can Webflow do for my website?
Webflow is a tool that helps you design and build websites without needing to code. It offers features like hosting, SEO tools, and a content management system.
How do I start using AI tools with Webflow?
First, you need to pick the right AI tools for your needs. Then, you can connect them to your Webflow site to improve things like content creation or design.
Can AI help with SEO on my Webflow site?
Yes, AI can help by suggesting keywords and optimizing your content so that it ranks better in search engines, making it easier for people to find your site.
What should I do if my auto-posting setup isn’t working?
Check your settings and make sure everything is connected correctly. If problems continue, look for help from guides or support teams to fix the issues.